
Mailchimp
Settings > Integration > Mailchimp
1. Sign up or log in to your Mailchimp account
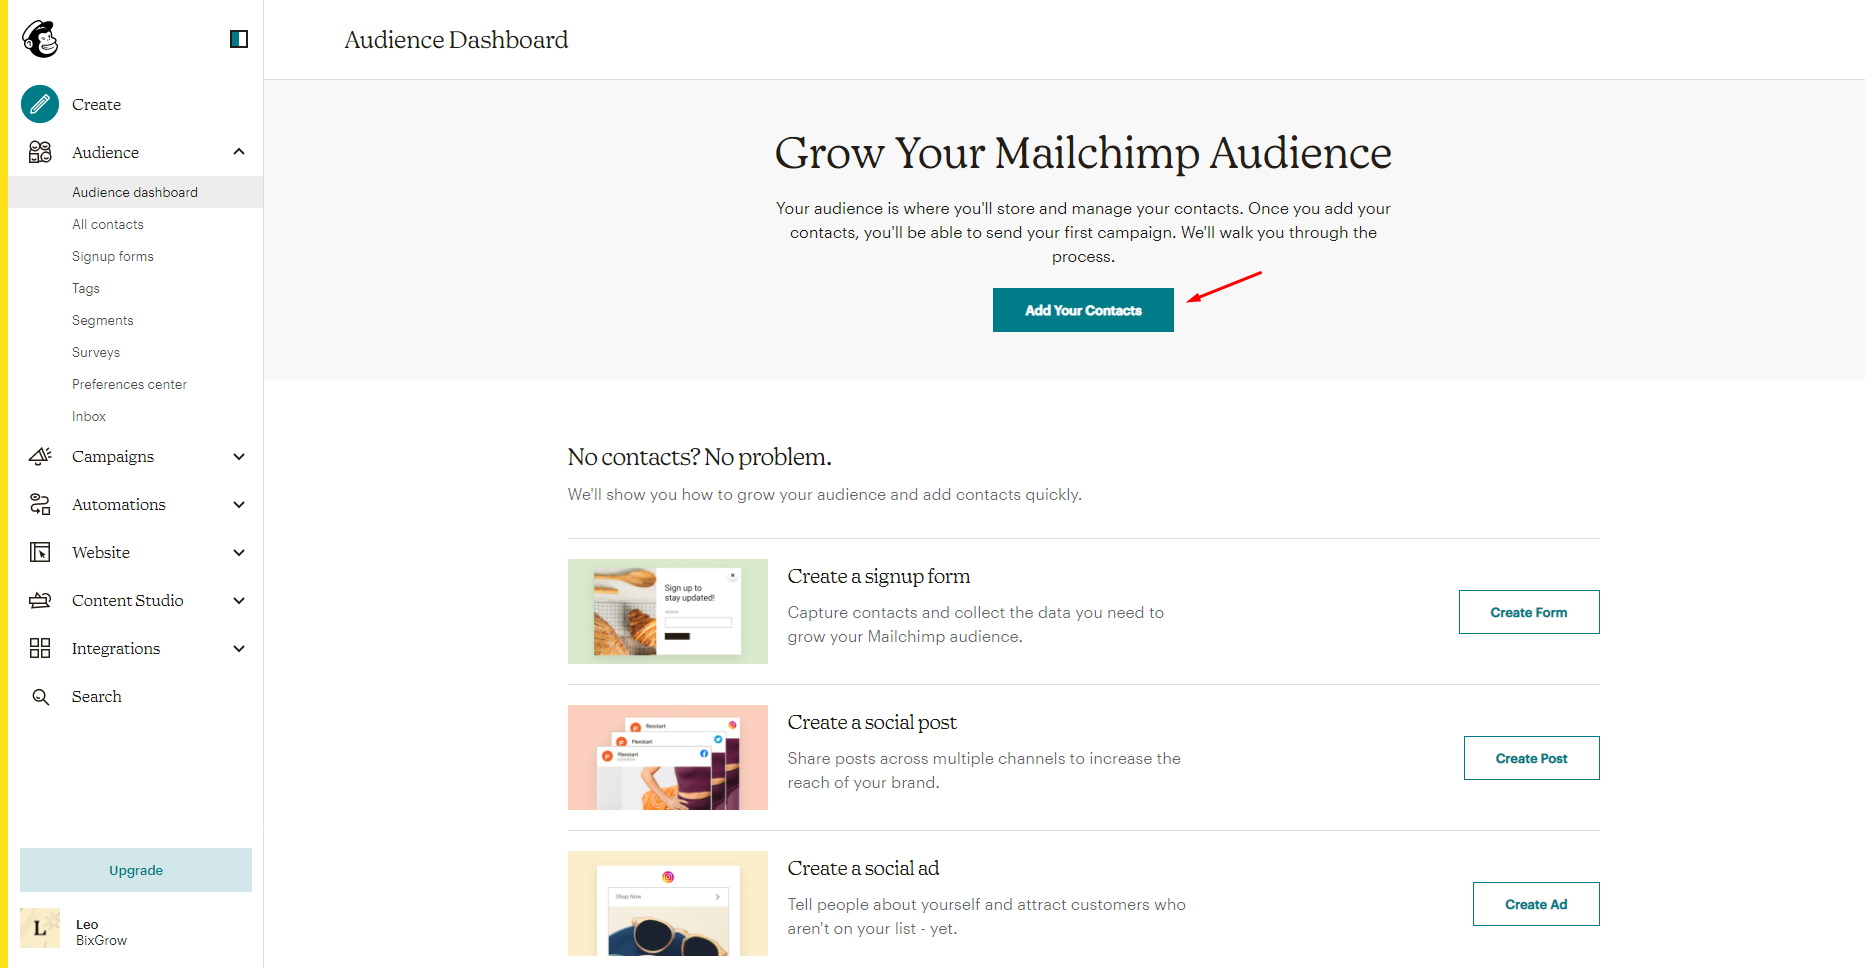
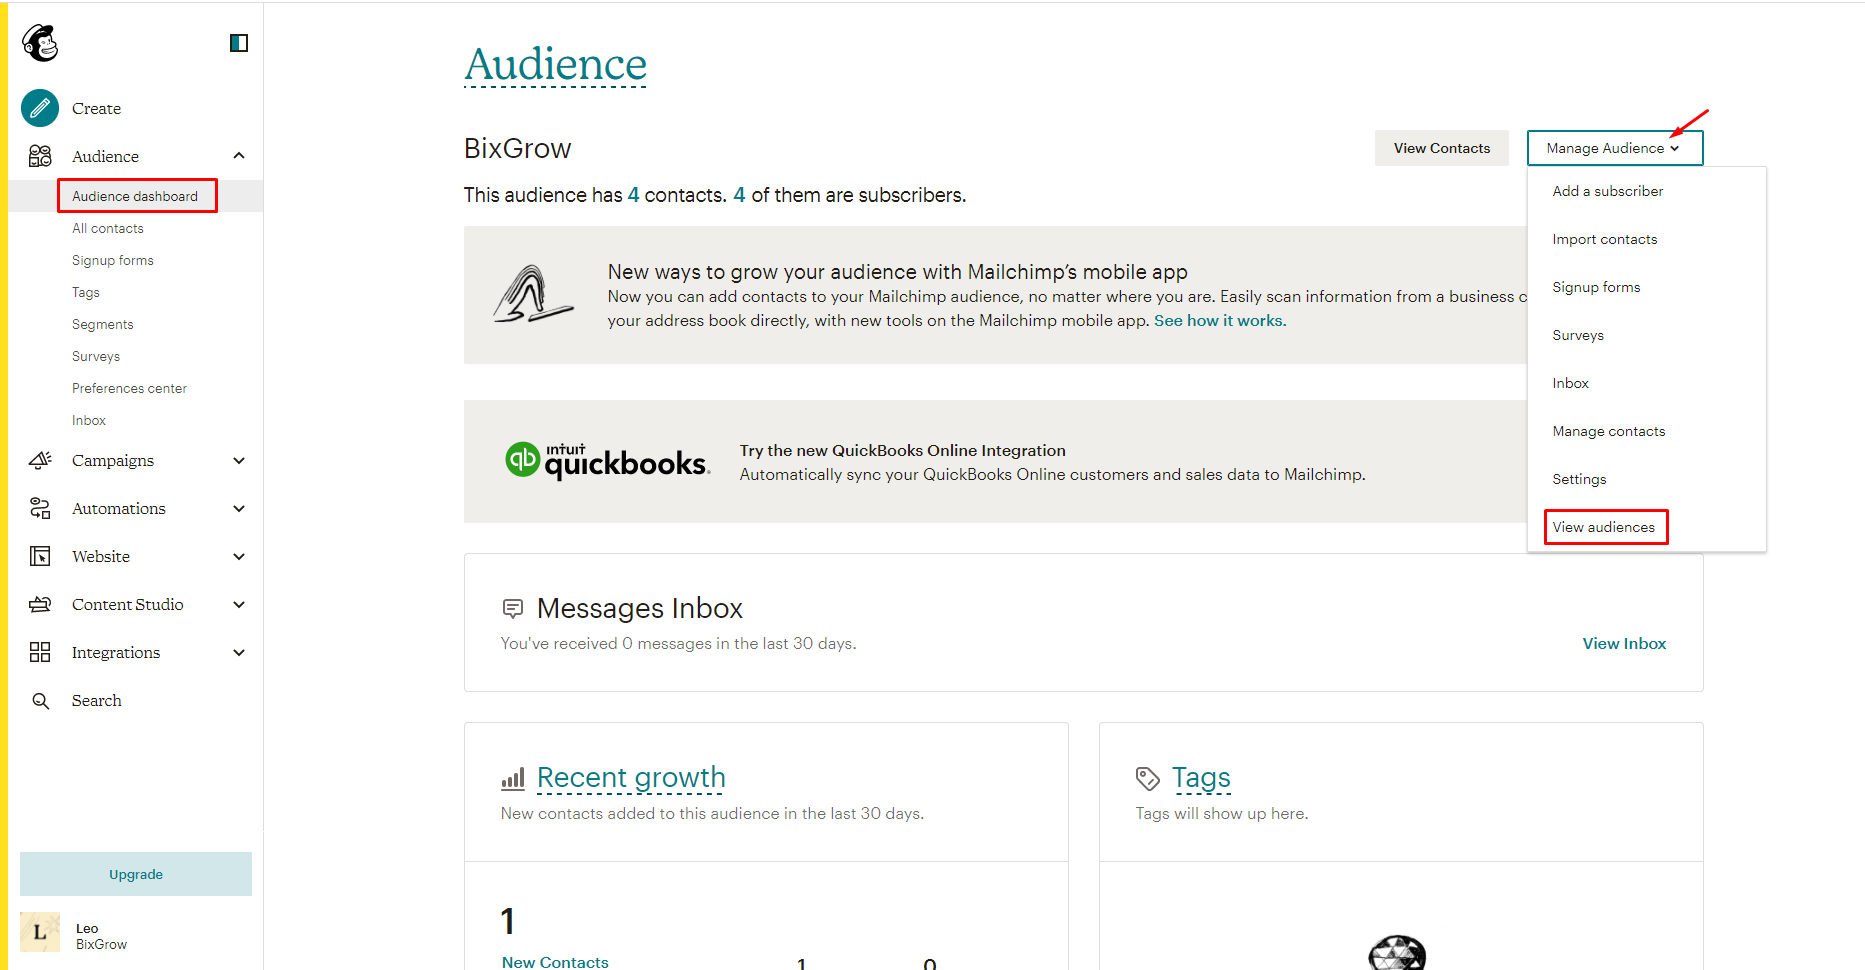
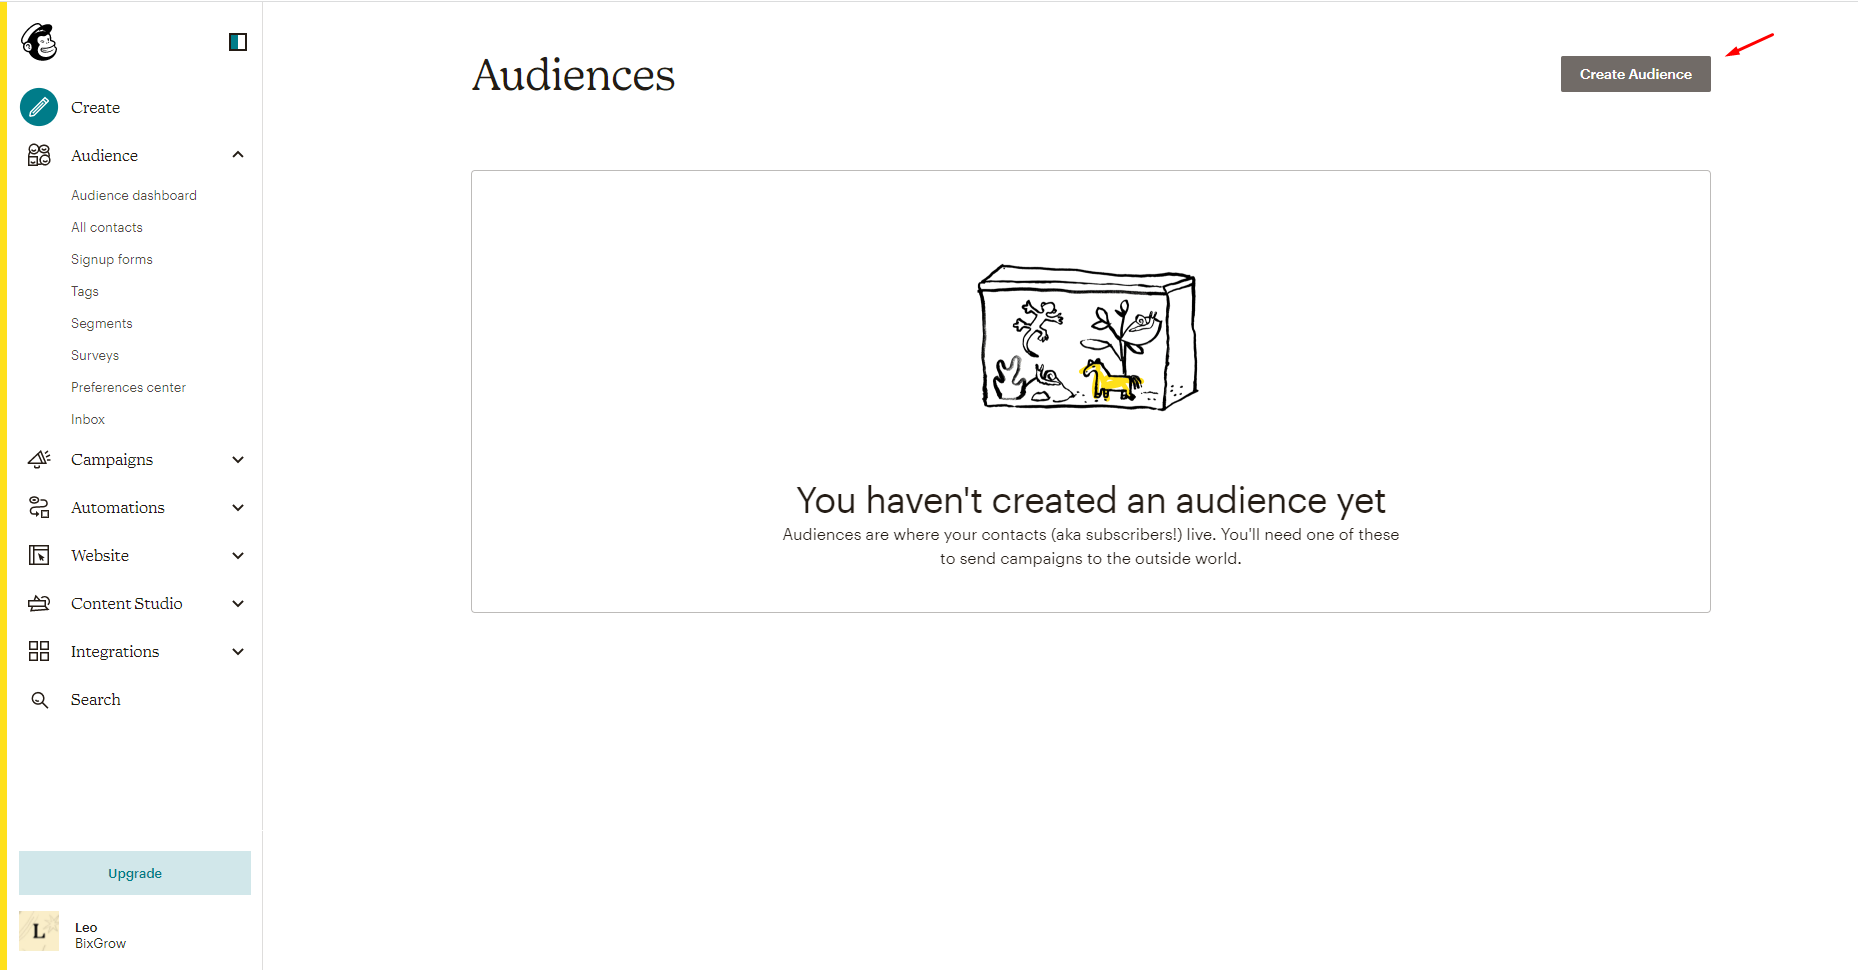
2. Create your contact list
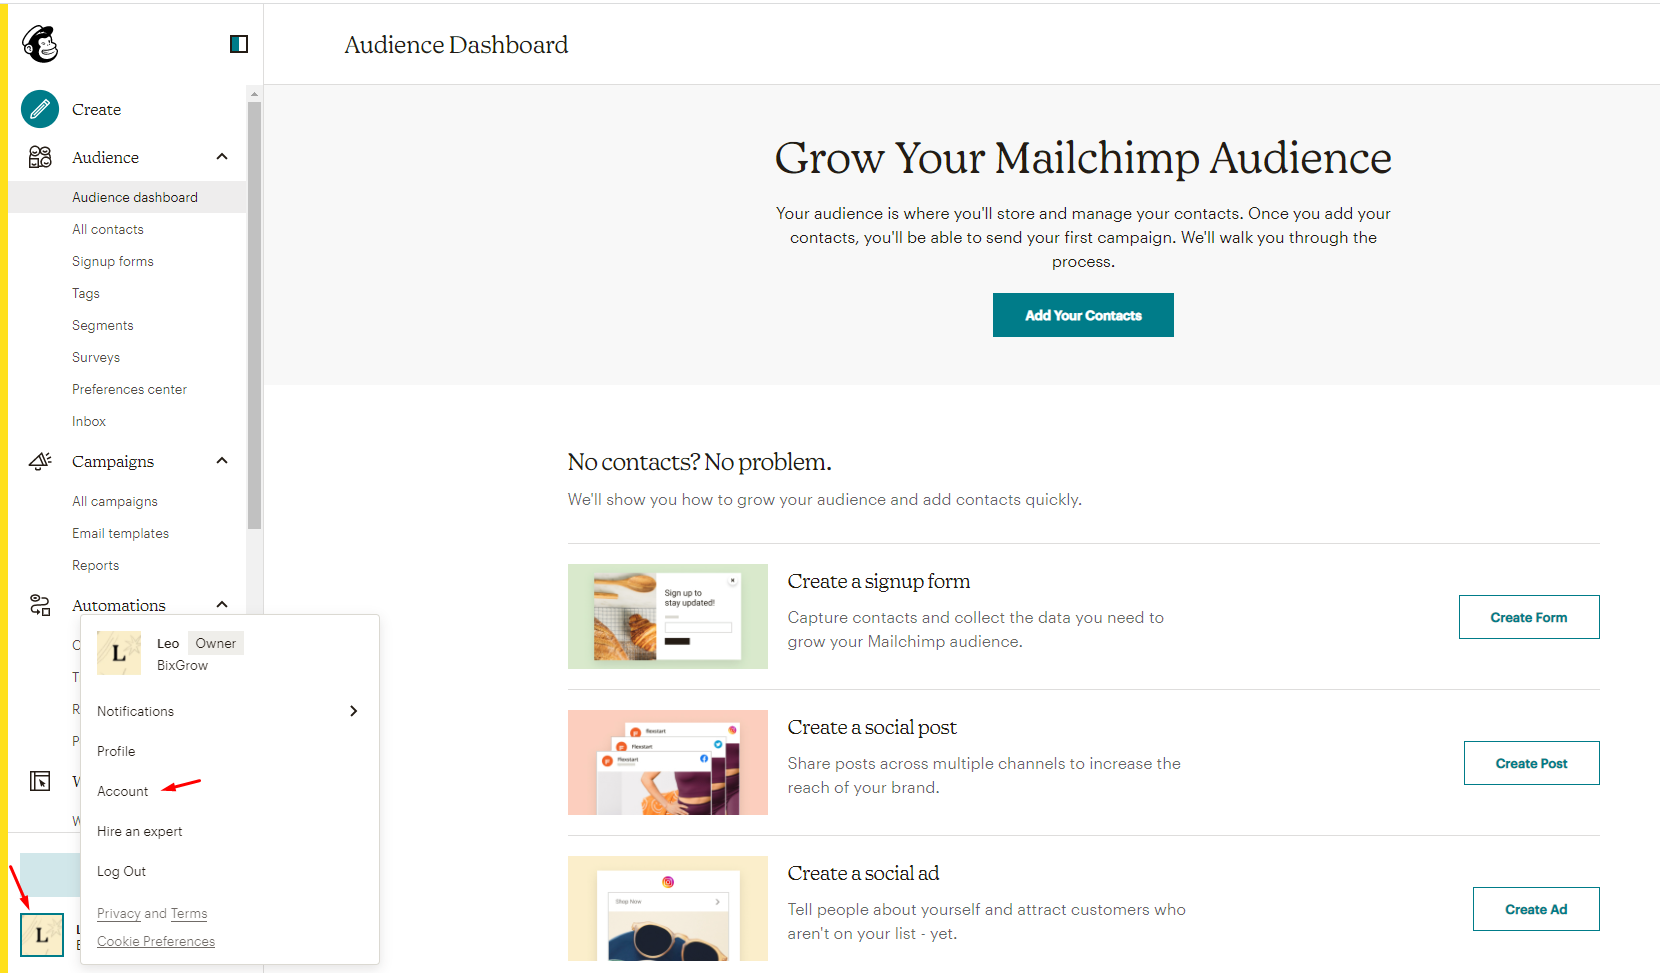
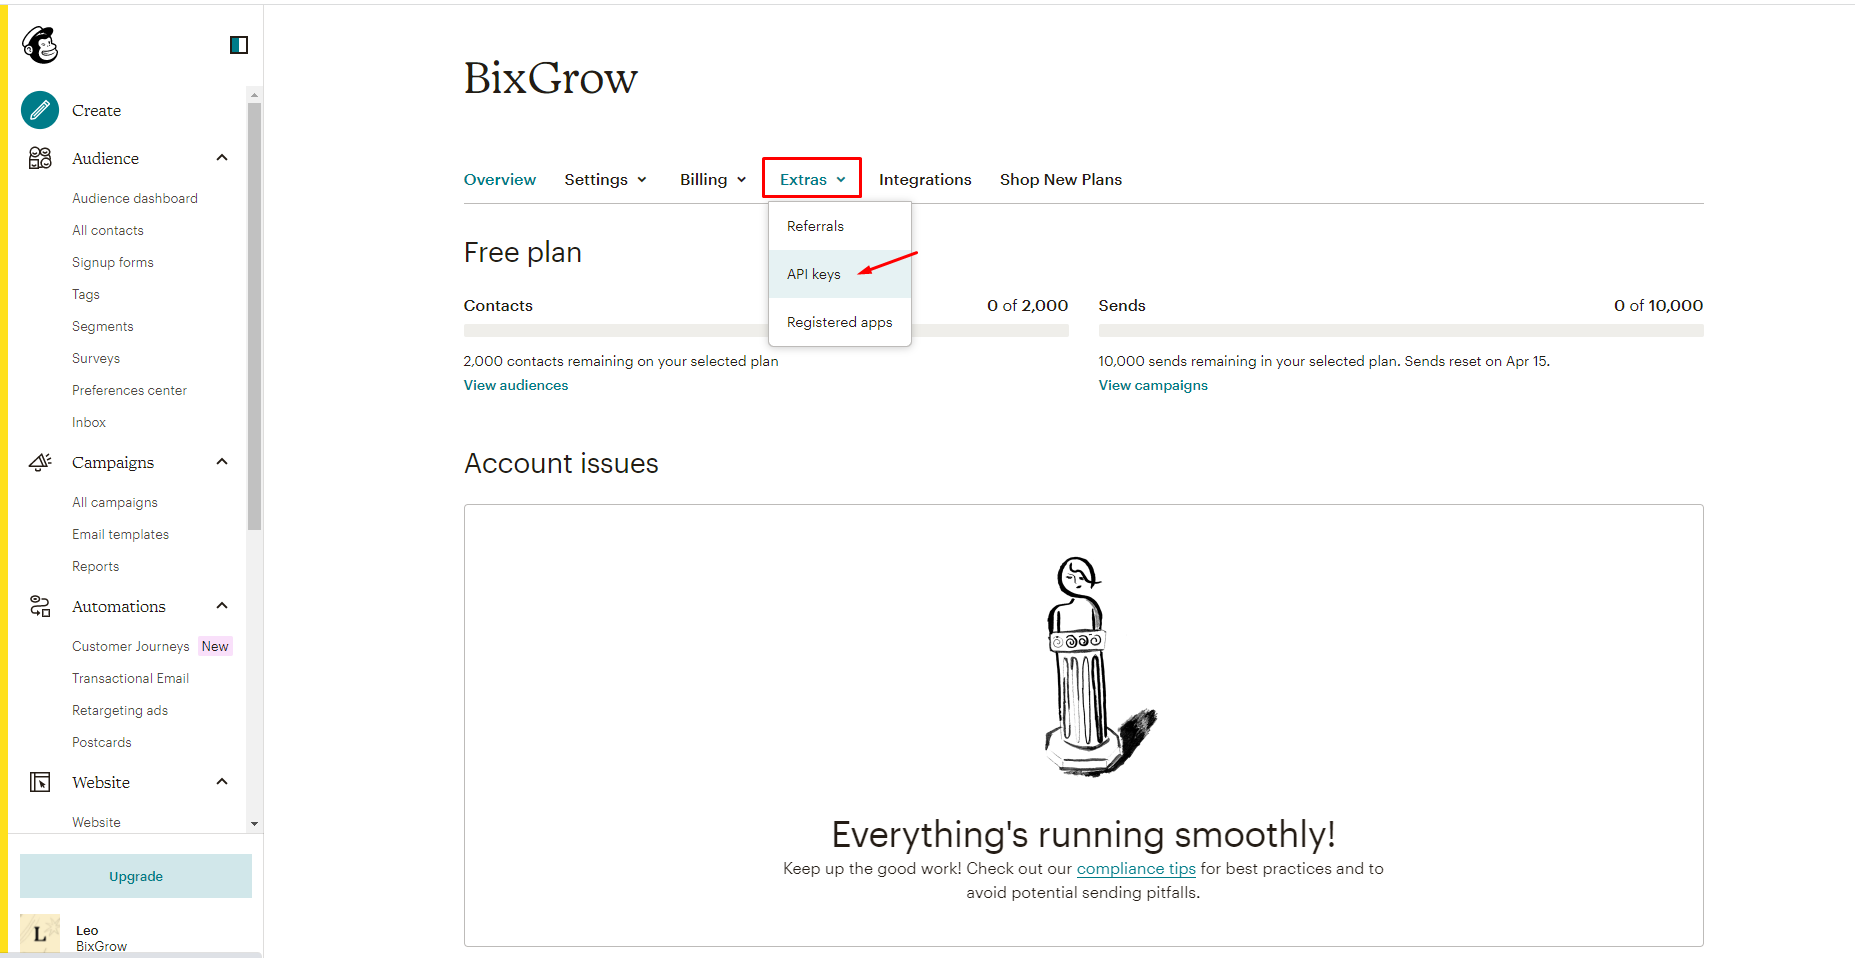
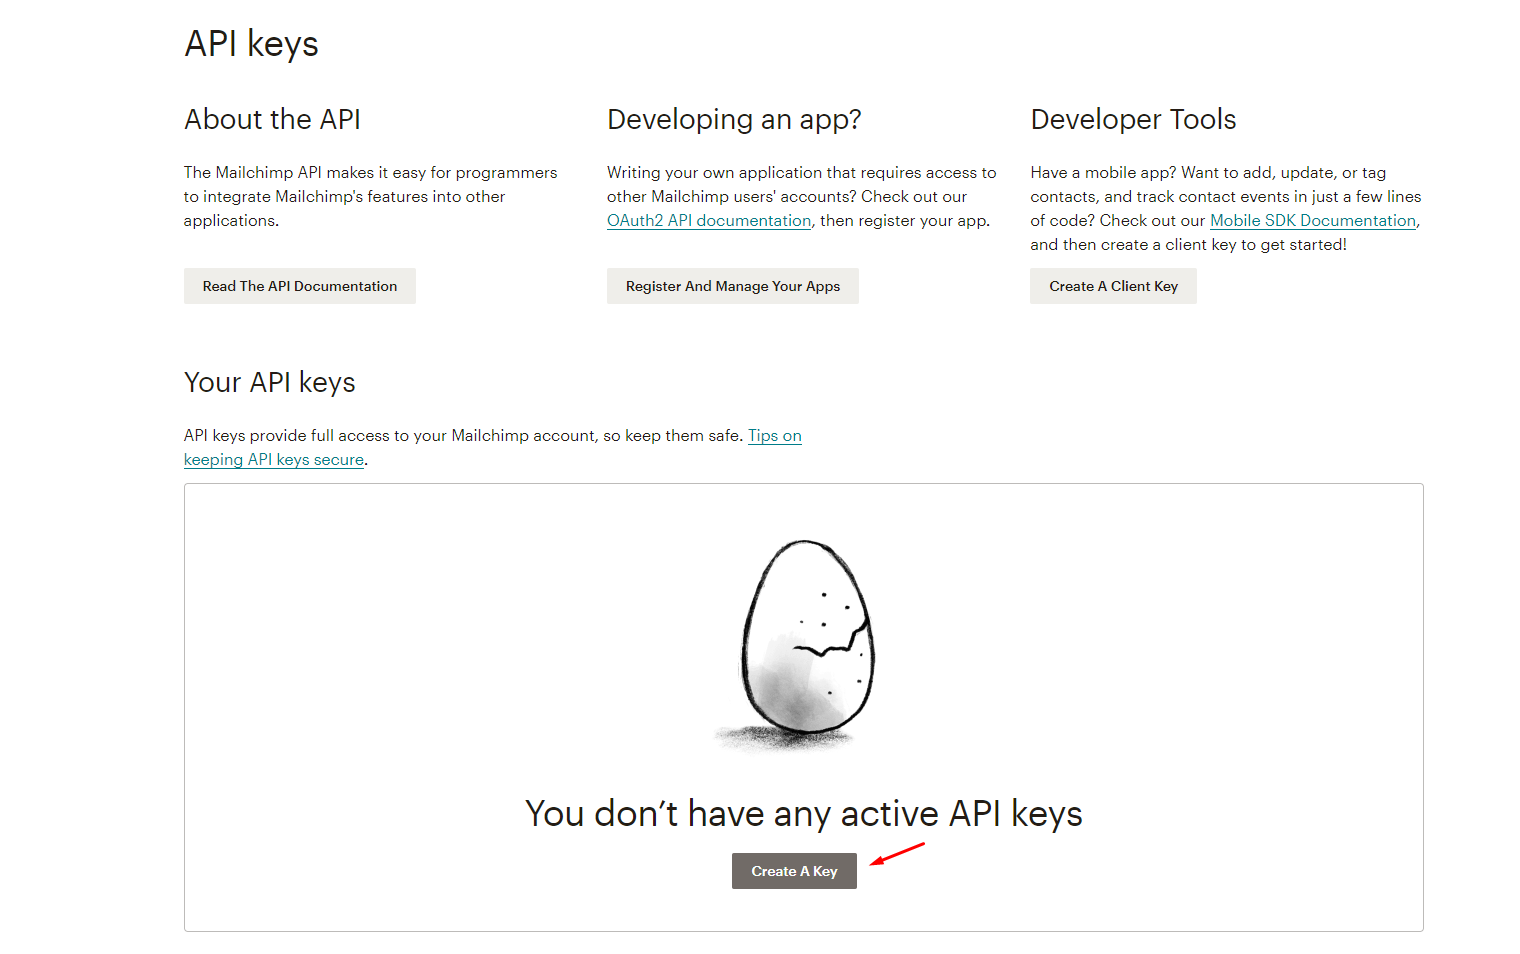
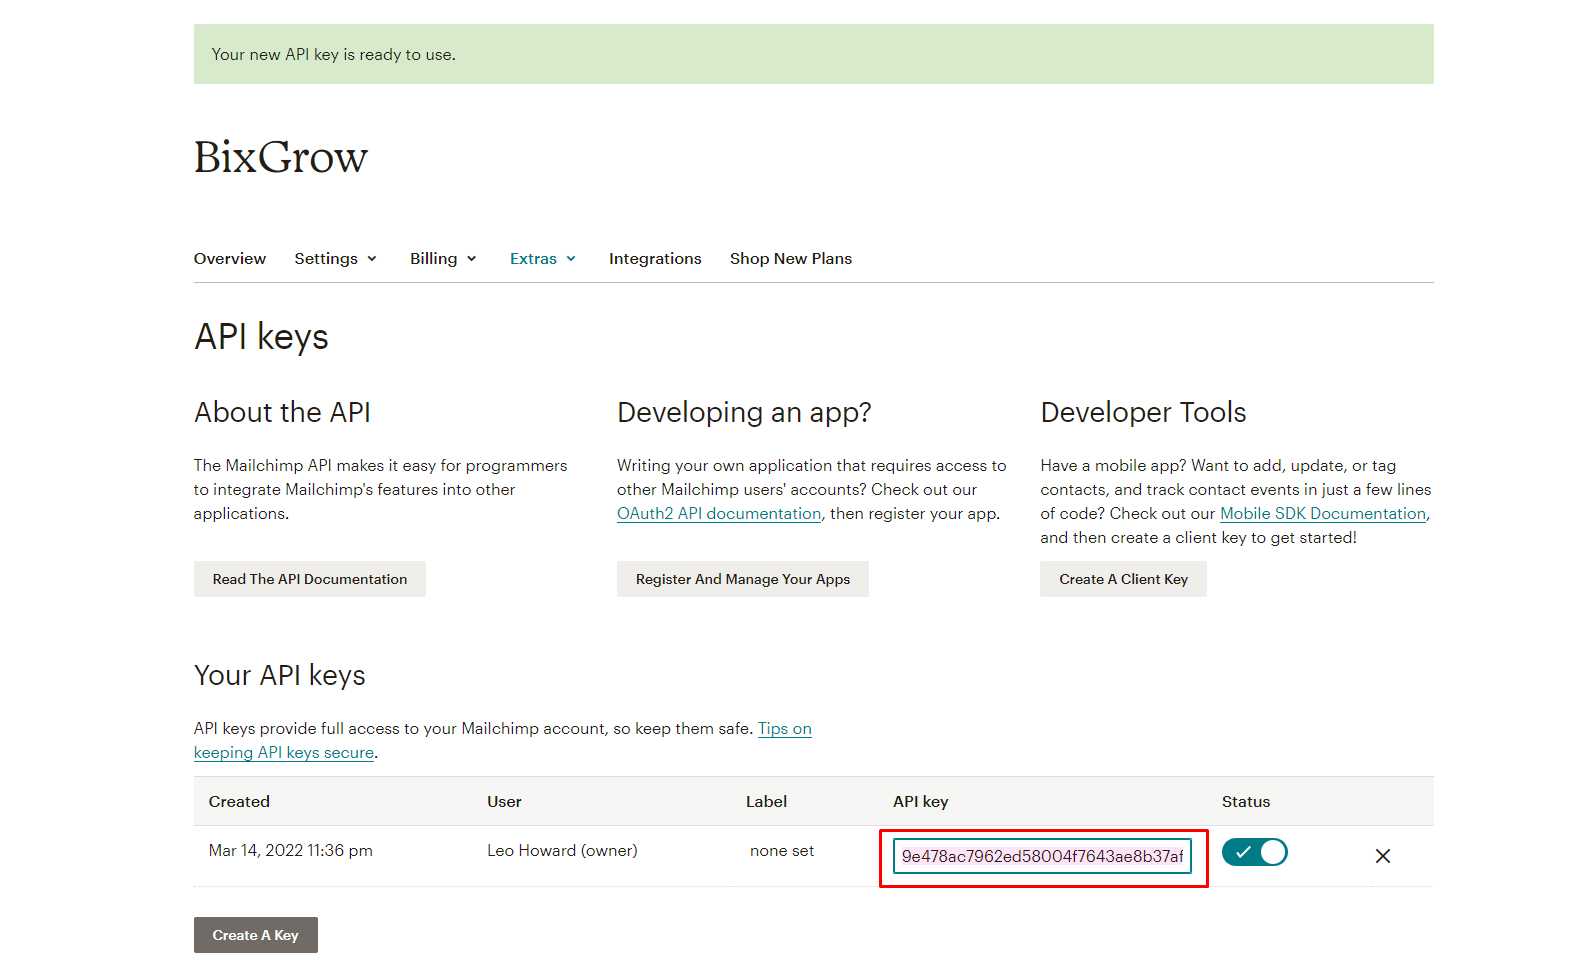
3. Get the MailChimp API key and integrate


Last updated